- To send tokens from one Osmosis wallet to another, open your Keplr extension menu and select the chain from the drop-down menu at the top.

- Select SEND to open the menu and see further options.
The DEPOSIT button here is where you can find your wallet address, either in plain text or QR code format.

- Enter the address to send the tokens to, and select the token to be sent. If a memo is required, enter that in the third text box - this is typically used for deposits to centralised exchanges.
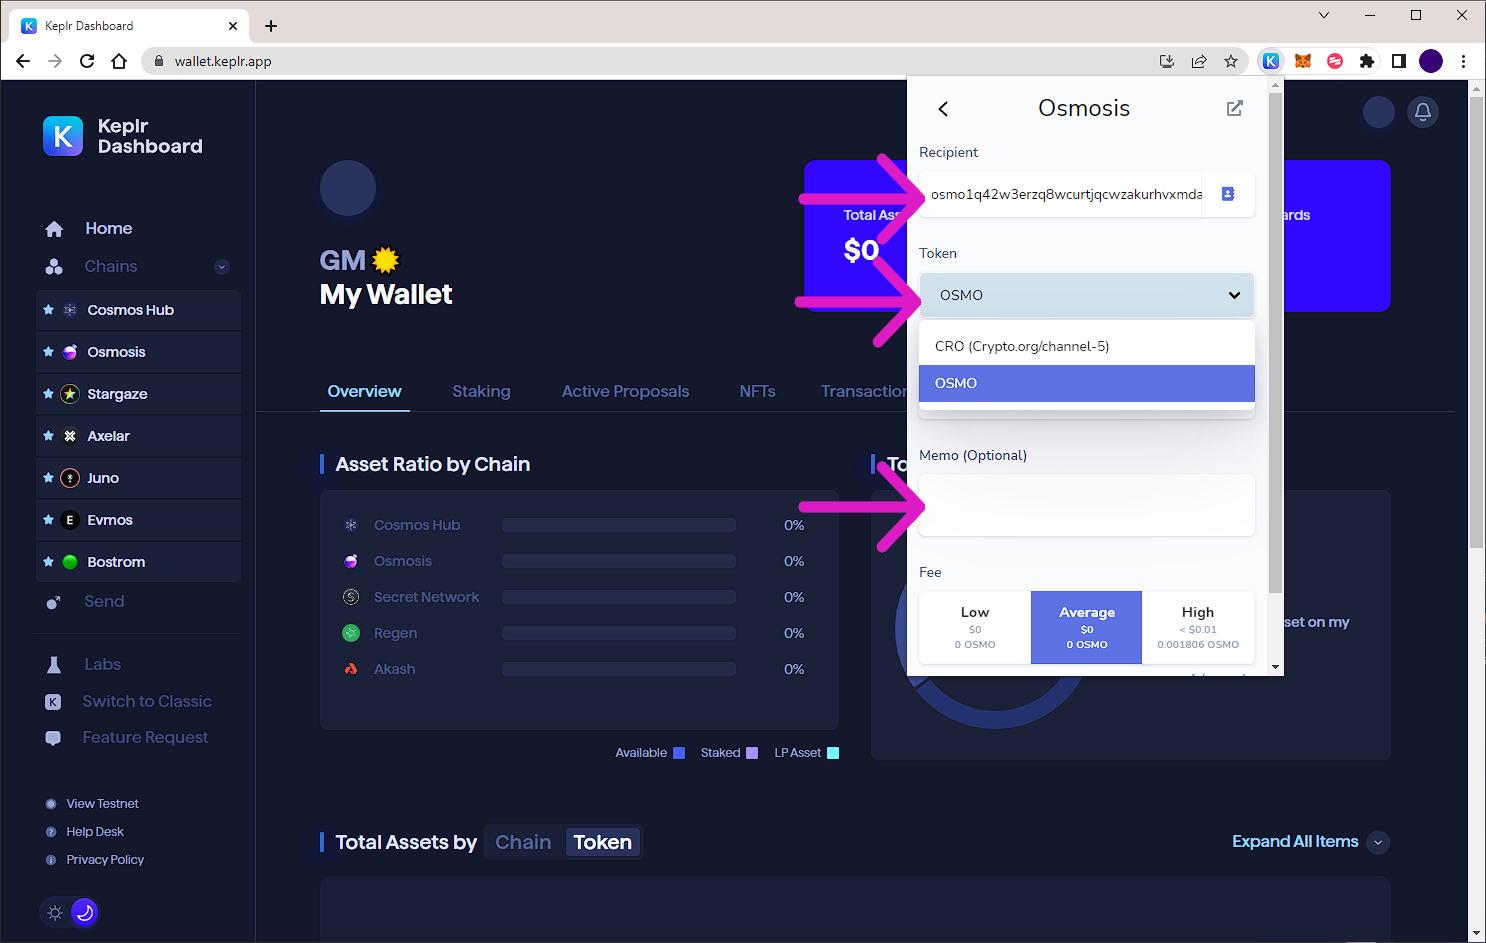
- 🧪 Avoid manually typing wallet addresses. Copy and paste is ideal to make sure your tokens get to where you want them to be.
You can send any token in the wallet this way, as long as it is within the same network - from one "osmo1..." address to another "osmo1..." address.
If a CEX requires a memo and you deposit tokens without one, your tokens may be lost! Follow their instructions carefully.
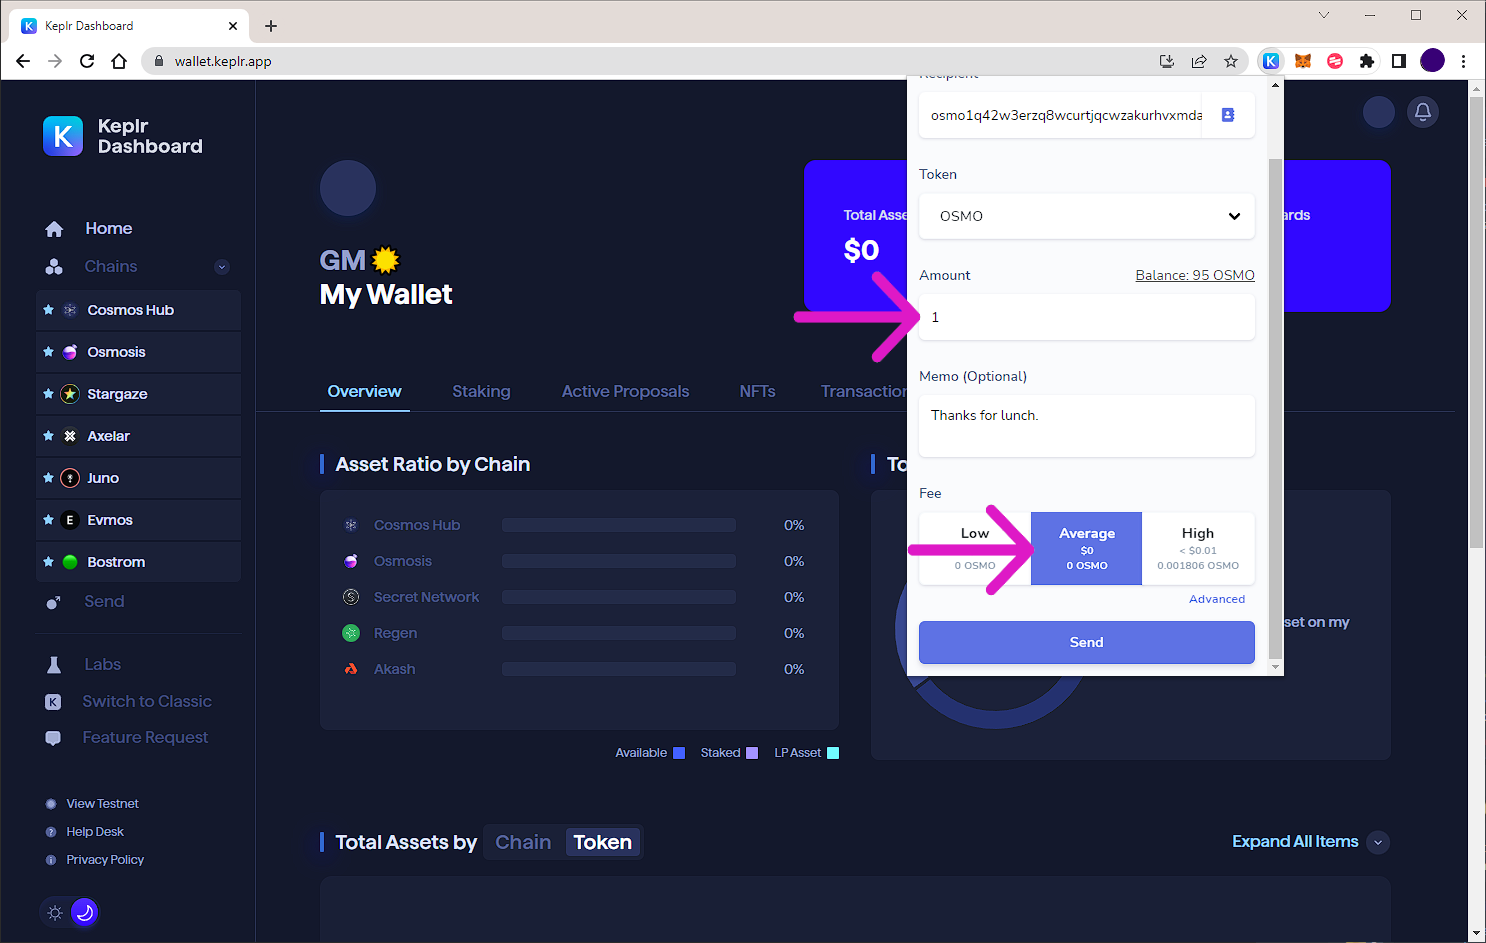
- Enter the amount to send and the amount fee to pay. The speed - and sometimes success - of your transaction may depend on your fee selection.
Remember to leave a small amount of tokens for future transactions!
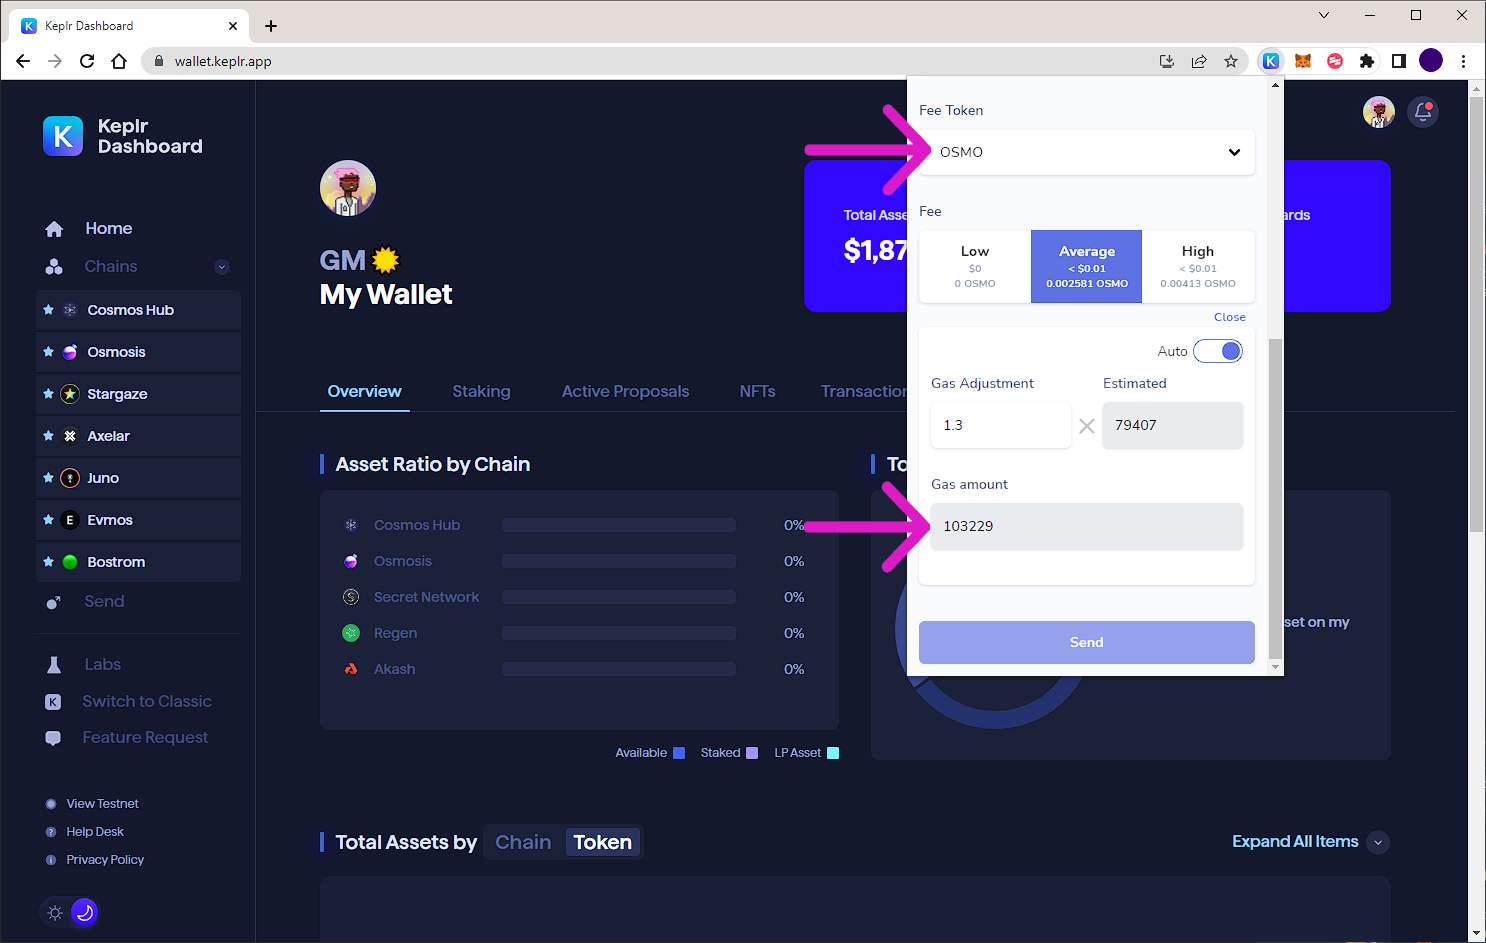
- If you click on Advanced under the fee settings, you will see some extra options. You can choose to pay transaction fees with a different token.
It also has the option to increase the gas amount, which can be useful to manage 'out of gas' errors. Note that if you increase the gas amount, the fee will also rise. Be careful!
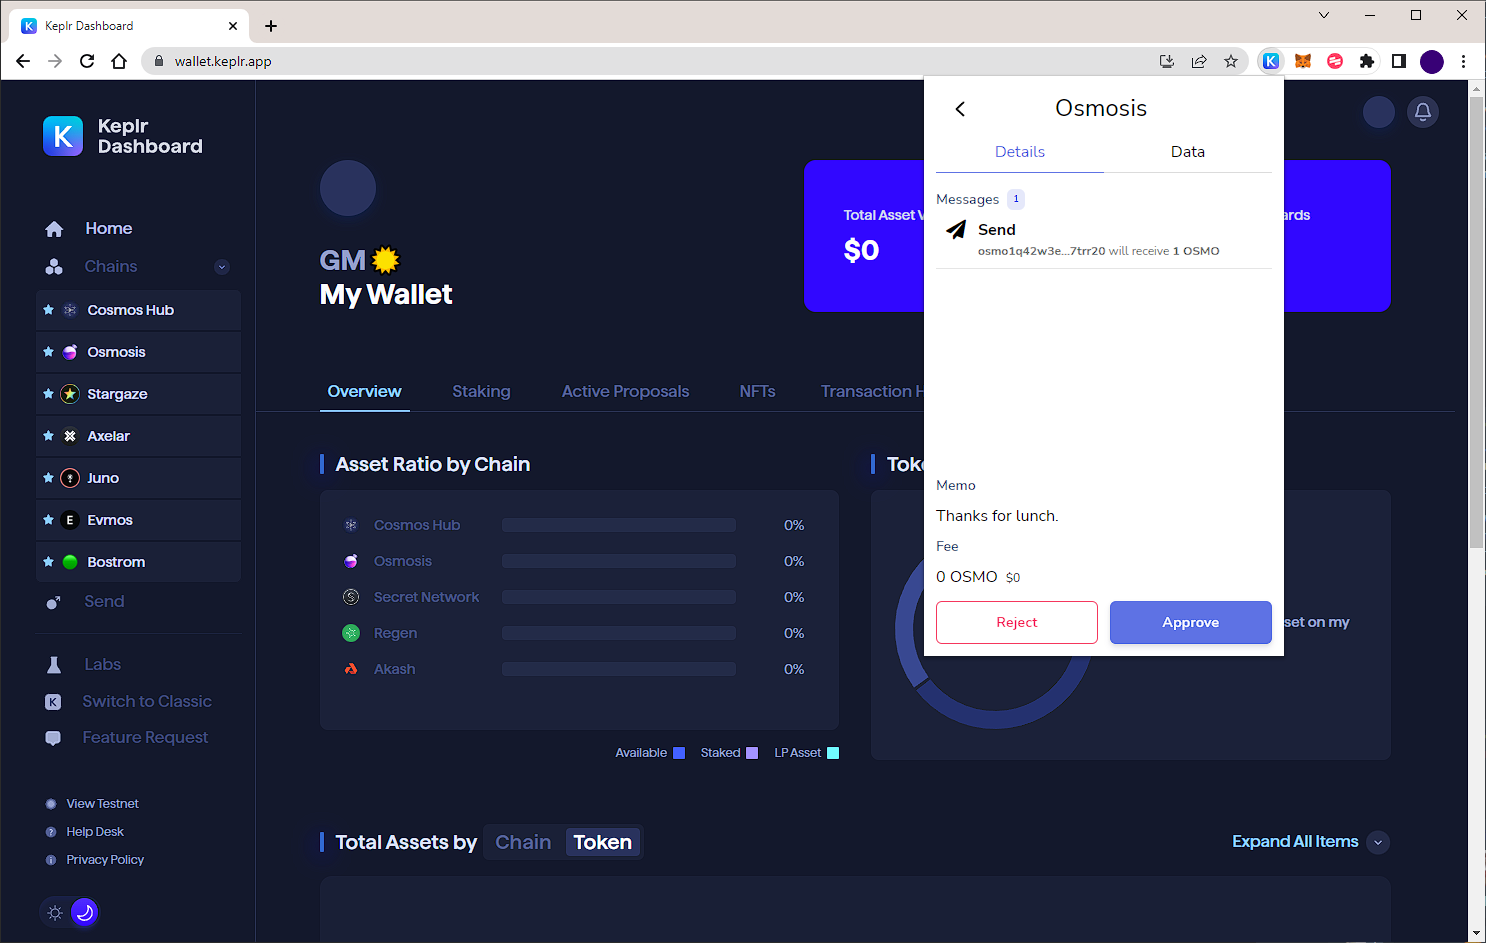
- After you've confirmed and double-checked the information, simply hit APPROVE and wait for confirmation of success. If you reject the transaction, no fee will be taken.